Views: 8641
To return to 
go to menu and select “Français”
There is no good way to get involved in paper modeling… There are as many as lovers of the discipline. Papercraft; How to
The experience will help everyone find their way. I want to show you, how I do it personally and after some solutions made throughout my achievements and designs.
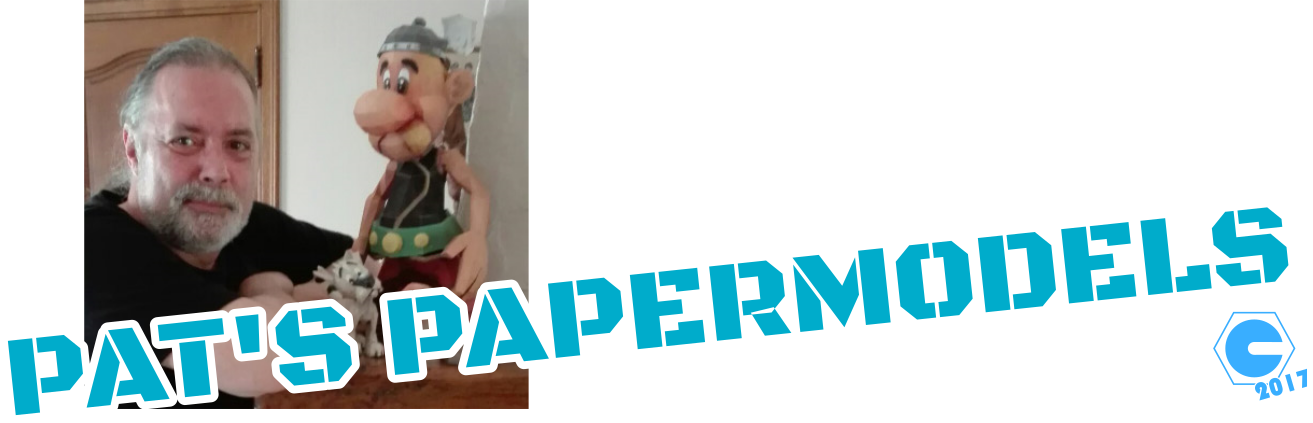
The tools : Papercraft; How to
The tools we need to make paper models are relatively conventional. Each modelist already has them …
This is one of the characteristics of paper modeling … The cost super little high. I think it has to be a hobby with one of the best price and fun time.
One thing may seem odd … Blunt blades. They will be used to mark the folds without cutting the paper.
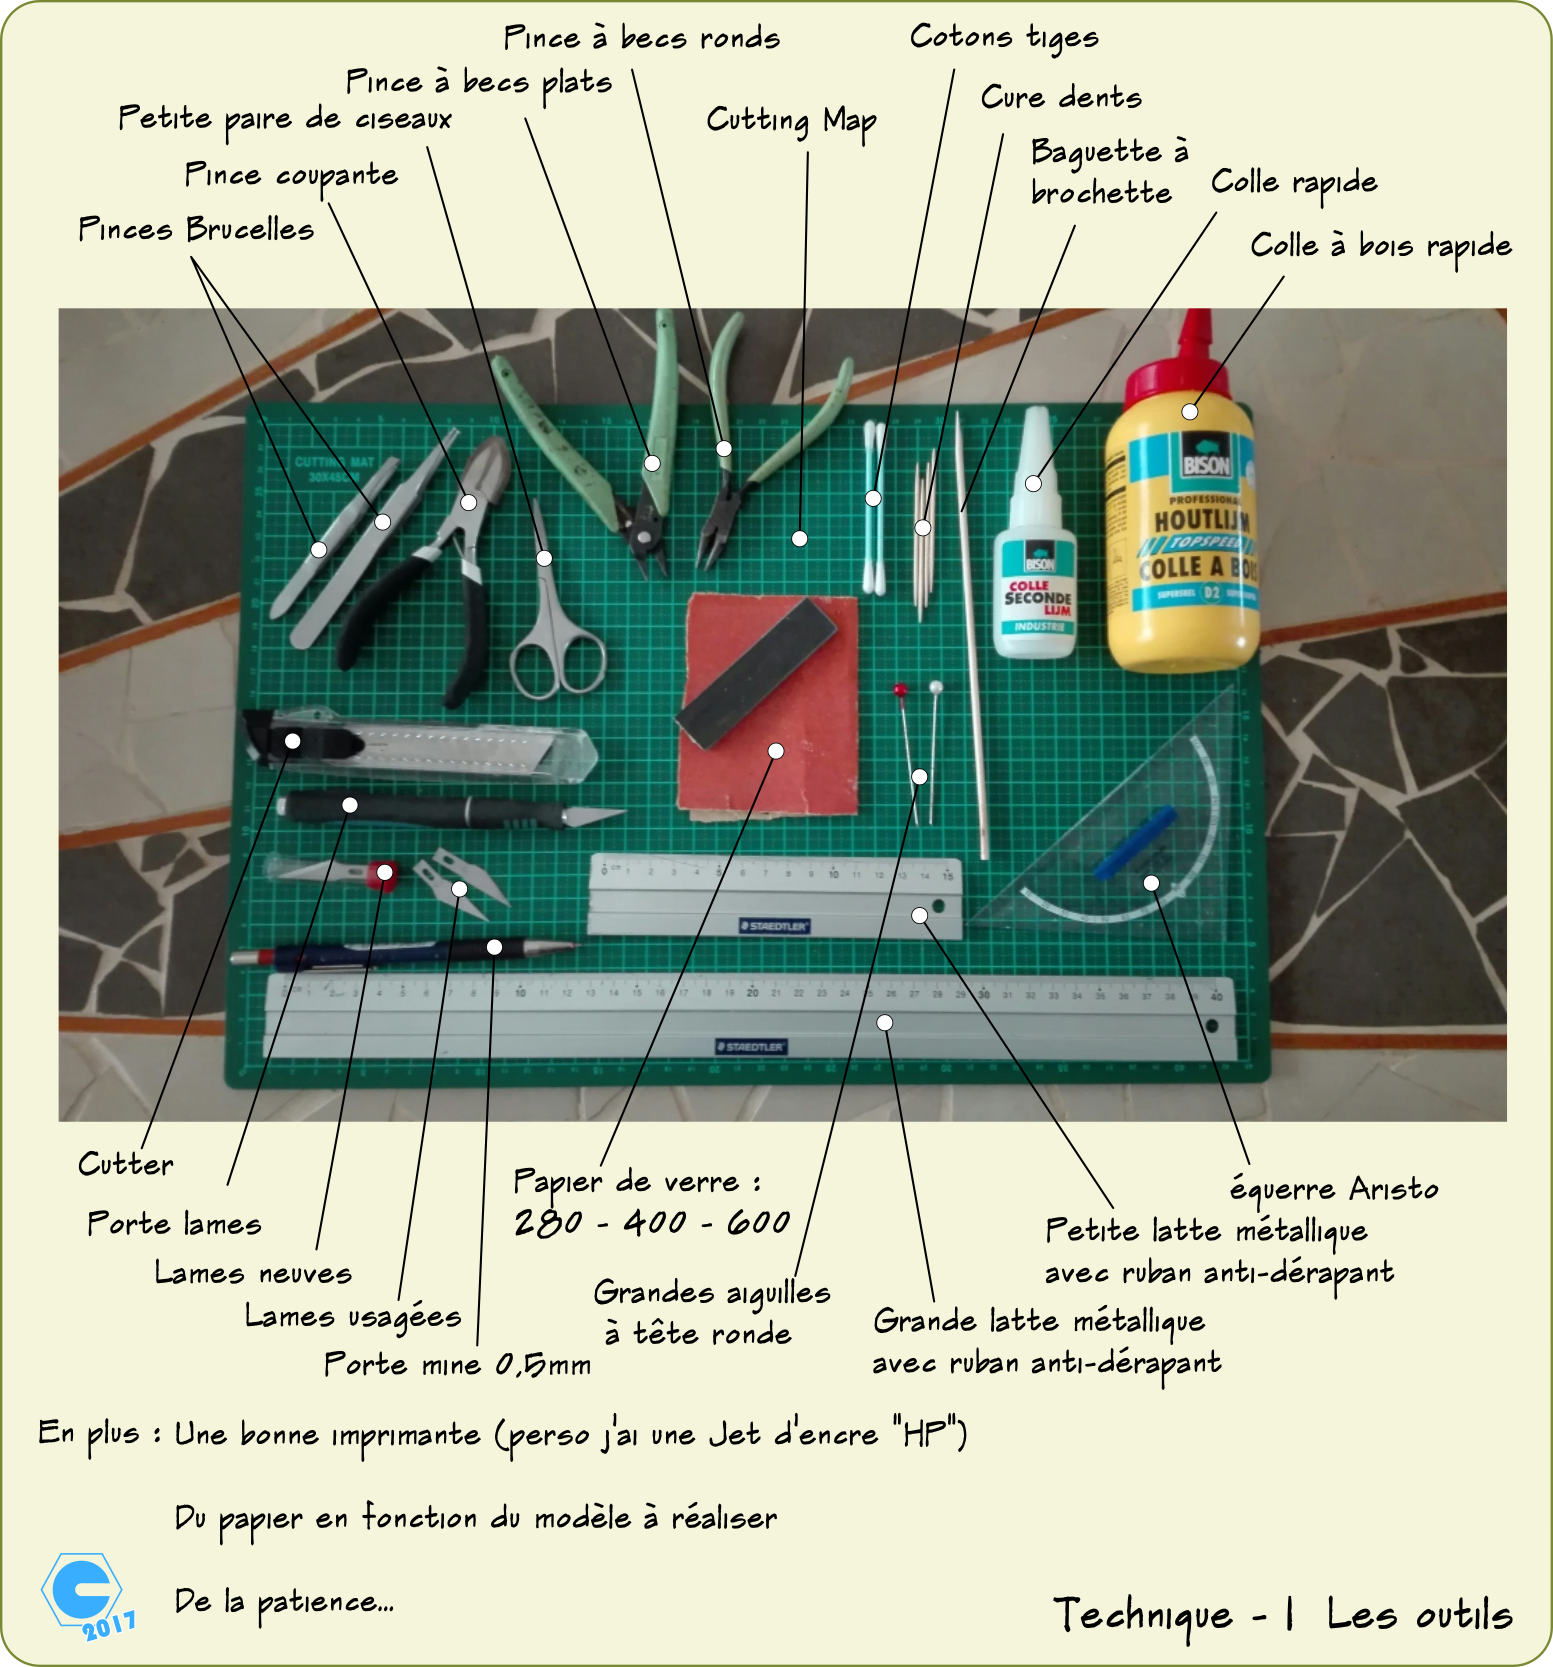
The paper : Papercraft; How to
The majority of paper model makers will enjoy the templates present on the net. It is usually enough to download and then print them. The format par excellence will be the page “DIN A4”. The standard size for the printer paper, 210 x 297mm.
The choice of paper is not an exact science … It will depend on the type of model to be made, the size of the pieces to be shaped, the size of the scale of your model … The majority of the models are equipped Texture of the model, it’s finishing. In general, you will always have a printed side and the back side blank. Attention, some models require printing on both sides.
We will therefore simply remember that the printed side is the main face of the printing.
There are lots of papers. The weight per square meter is always given on the market papers. This is important because it determines the thickness of the paper. 80 gram paper will be used for small parts and small models. The 160 gram paper will be used for larger scales.
I frequently indicate on the templates that I create the type of paper to use.
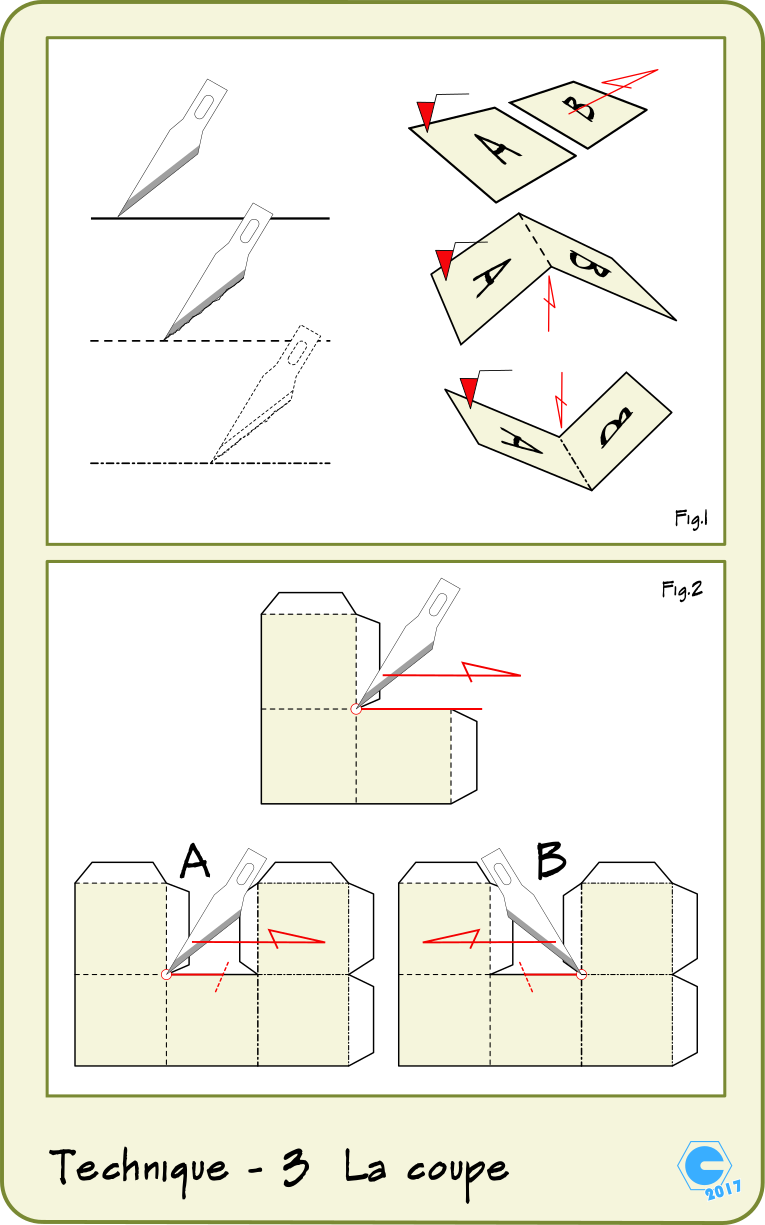
The cutting : Papercraft; How to
The meaning is to determine the type of work to do once your template is printed.
The first drawing shows the different lines you will find. The continuous line, the dotted line and the axis line. These different ways of tracing tell us how to preform our parts.
Cut out your piece first by keeping a margin all around. Then began by marking the folds present. The interrupted lines indicate the marks to be marked (pass a blunt blade without cutting the paper). The dotted lines will be marked on the print side, the axis lines will be marked on the back of the paper. My technique for these is to drill a small slit in the paper on either side of the piece, then turn the sheet and mark the paper between the two notches. Do not forget to mark the folds of the bonding serifs …
Finally cut out your piece. It is very important not to cut too far and therefore damage your parts. Always leave a corner and cut out. If you are in front of a piece with a cut between 2 corners, leave one of the two towards half the cut and then leave the other point to join the first cut.
Be careful, always cut away from the fingers that hold the part … An accident is soon arrived..
The folding : Papercraft; How to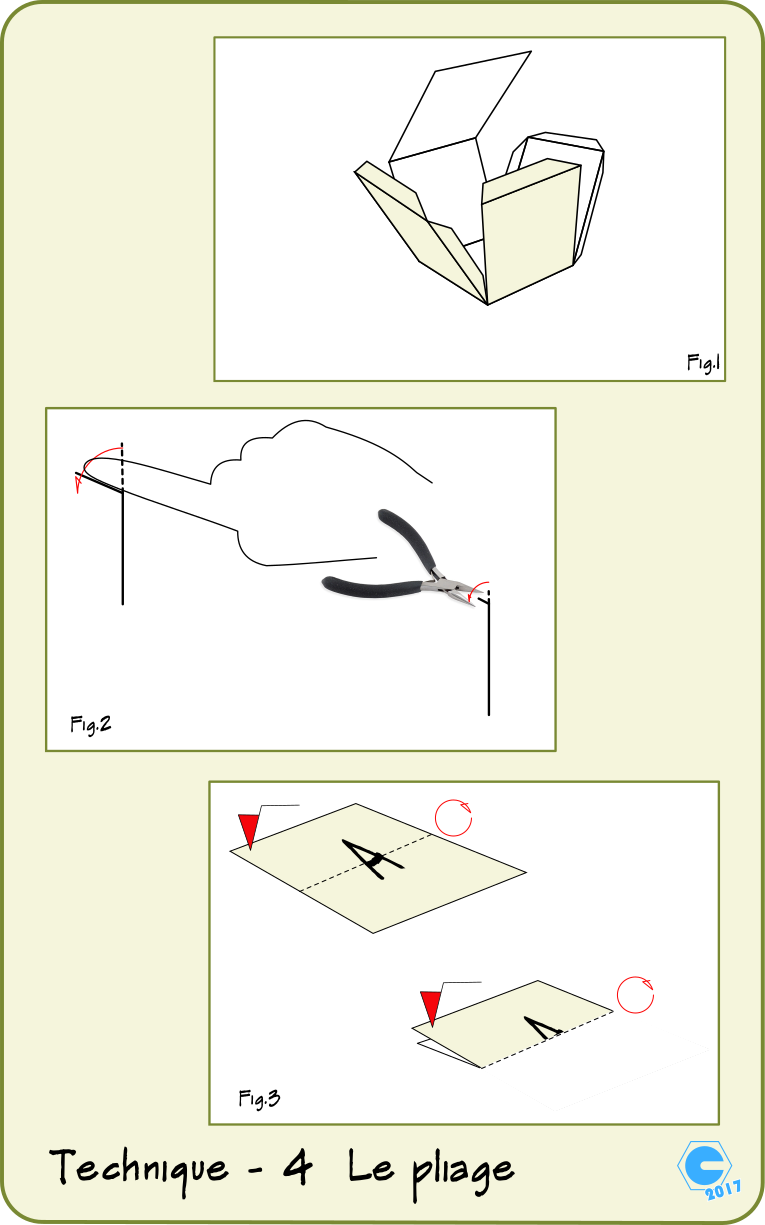
The first thing to do, from your cut-out piece, is to pre-fold whatever has to be fold. Give each side of your piece its future shape. Collage will be greatly facilitated. Also check if everything matches and especially if you have well understood the assembly to do.
The models usually can be folded with the fingers. It may be better to bend the tiny pieces with flat pliers. This will prevent damage to your part.
The arrow sign in a circle near the fold line tells you that the piece bends to itself.
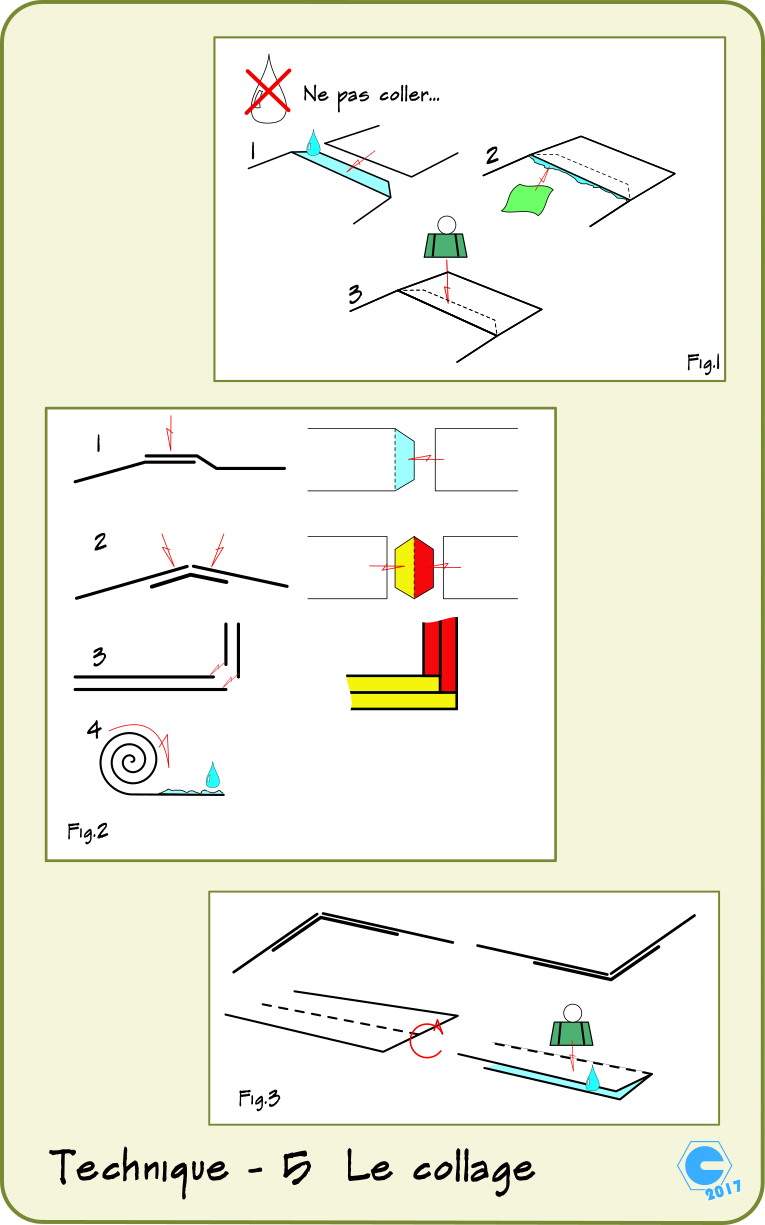 The assembling : Papercraft; How
Unless indicated, the parts will stick together. Place glue on the tab and place the piece as shown. The excess glue should be wiped off before pressing the assembly. When assembling long pieces, adjust the ends and then begin to press the middle of the tab and then go towards the ends. If a small defect should exist, by sticking in this way, you reduce the defect by two …
There are mainly 3 ways to assemble the pieces:
1. One on the other : the majority of the models foresee this type of assembly. It has a major flaw, there is always a visible slice of paper. In general, it is white and can sometimes obstruct the view.
2. End to end : I prefer by far this type of collage. It requires an additional collage, but the result is much more beautiful. It is possible to use this technique with models provided for in point 1 but it will be necessary to manufacture the assembly part.
3. Without bonding feet : My favorite technique for the models I create. Go see my Willys jeep and you will see the benefits of this way of working. Not only do you have the advantages of the “2” technique but in addition you do not have any more on thicknesses, which is a real treat …
Always glue your pieces, trying to position them as close as possible to their final shape. This will prevent you from stressing the folds once your collage is dry.
Do not hesitate to contact me, if you encounter any worries or for any questions and / or remarks.
You will find a form on my page : — Contact —